Sunday, March 30, 2014

Happy Birthday Ashley!

My beautiful daughter, Ashley, celebrated her 19th birthday! Man they grow up so fast. She is our baby, so this is the hardest one!

Ashley loves anything "Owl" so I made this card for her which was Inspired by Doreen Watkins - Independent Close To My Heart Consultant.


I used the Artbooking Cricut Cartridge in the Cricut Craft Room to cut the elements for this project. Here is how I laid my paper out on the cutting mat. I always prefer to layout all of the paper that I will need so that I don't have to unload and reload the mat. What do you think?
All papers and stamps are from Close To My Heart as well as the Artbooking cartridge.

Here are some close ups of the Owl and Balloons, which I covered with Liquid Glass and secured with Baker's Twine. I also applied the Liquid Glass on the eyes of the owl. You can't really appreciate it in the picture, but trust me, ADORABLE!

Lastly, I usually decorate the inside of my cards as well, and this one is no exception.
So please join me in wishing Ashley a Happy Birthday!

This Birthday Card is also being submitted to The Card Concepts challenge for Birthday Cards. Great timing! My card is what I consider a Clean & Layered style.

Saturday, March 22, 2014

Friends Make Life Colorful! Everything ABC's Blog Hop

Welcome to the Everything ABC's Blog Hop!


For this hop we will be featuring the letter F. This may be the name
of a paper, a stamp set or an embellishment. Whatever the Crafter has
chosen as their "F" element will be featured in their post. For me, I am going with Flowers and Friends.

If you have just hopped onto my blog, please start at the beginning at Linda's blog ~ Scrappy Therapy.

If you came from Darlys Recker's Crafty Happy blog, then you're on the right track!


I used the Cricut Craft Room to create the pieces for this basket using the Artiste Cartridge. I used the 12" x 24" mat because I wanted to make the basket as big as possible and to fit the entire piece of 12" x 12" piece of cardstock. 
To see a video of exactly how I made this project click on the image below.


Your next stop on our Everything ABC'S blog Hop is Judy Faye's Place, head over and see what she has prepared for you!

In case you get lost along the way…go to Scrappy Therapy for a complete list of participants!

Wednesday, March 19, 2014

Creatively Redeeming Team – March Blog Hop

Welcome to our March BLOG HOP!


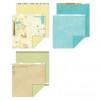
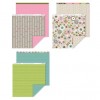
I am so glad that you have joined us this month! This month we are featuring the Ivy Lane Paper Packet. If you came from Elizabeth Mindemann's blog, you are in the right place. Here is what the Ivy Lane Paper Packet looks like:

http://papercraftingwithangelina.ctmh.com/Retail/Product.aspx?ItemID=7648&CatalogID=657


I decided, that since Close To My Heart is also having a Special with the Studio J, that I would share some of my projects that I created.


During the month of March, order your Studio J™ layouts—including ones using our new Photo Express Collection—for only $5 each! Now you can quickly create gorgeous, personalized studio layouts using our wide selection of papers, collections, patterns, and embellishments. And don’t forget to check out the templates in our new Photo Express Collection, which allow you to design layouts entirely comprised of photos in minutes. To be honest, I had never used the Studio J program and I have been with CTMH for over a year now. Wow, am I ever glad I finally did!  I love how quickly I was able to take my stored photos and pop them into the layouts, add a few embellishments and Wala! 


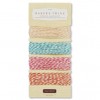
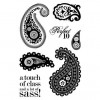
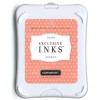
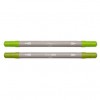
I can also add more details and embellishments once I receive the layouts to combine both Digital and Traditional scrapbooking! Below are the Complements and embellishments that go with the Ivy Lane Paper Packet. Aren't they lovely! I love it and so will you!

http://papercraftingwithangelina.ctmh.com/Retail/Product.aspx?ItemID=7722&CatalogID=176

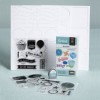
You can also purchase two different Workshops On The Go in the Ivy Lane series. So as you can see, there are so many options with this lovely paper packet. Which will you start with?
Ivy Lane Cardmaking Kit
Ivy Lane Scrapbooking Kit
I hope you like my projects and take advantage of this great price! Your next hop is Helen Gullett's blog to see what she has created for you this month. just in case you got lost, you can always go back to Elizabeth’s blog to see the full list.

Thanks again for stopping by and Happy Paper Crafting! ~Angelina

Monday, March 17, 2014

Happy Easter Mojo

Put this quick card together in the spirit of Easter. Just love the cute little Chickie.

I am entering this in the Mojo Monday #337 challenge. I have these cards for sale in my Etsy shop as well. 


Friday, March 14, 2014

400 Facebook Fan Giveaway

I am so happy to announce that I have finally reached 400 Fans on Facebook (well I should after this Giveaway!).  To celebrate I am giving away one of my favorite stamp sets.....Life is Tweet!


This is the first of many Giveaways! There will be two winners, chosen randomly by Rafflecopter.

a Rafflecopter giveaway

Thanks for entering and good luck! 

Thursday, March 13, 2014

How to Use Emboss-Resist Technique with Watercolors

So here is a trending technique that I wanted to share with you. Emboss-Resist with Watercolor. Have you tried it yet? I am loving this technique as a way to create some beautiful backgrounds for my cards. 


By using white embossing powder on my watercolor paper I create a 'resist' to the ink used for watercoloring. I really saturate the paper so that the colors that I use will blend well as you can see in the pictures.


For the watercolor I simply used my Exclusive Inks and a brush and applied the ink directly to the watercolor paper. If you would like to see a video tutorial on how I created the card on the left, click on the card above.

I also did a slight treatment to the inside of each card as you can see here.


I hope you enjoy the video and if you have any questions, please don't hesitate to ask! I love helping. 

In the meantime, Happy Paper Crafting! ~Angelina


Wednesday, March 12, 2014

Simply Beautiful Card Set

I recently had a request for a set of note cards from a dear friend of mine. I have been wanting to make some note cards with the Hostess Set "A Mother's Love" and this was the perfect opportunity! 

 
Each 2-3/4" x 4" card is created with a flower that is slightly different, whether it be the colors or how they were stamped. I used Cotton Candy and Sorbet stamp pads for the flowers and Pear for the leaves. I also used my Pear and New England Ivy alcohol markers for the stems. I double stamped the sentiment to create a shadow. 

If you noticed the sparkle on all of the flowers, well I used the Wink of Stella Brush in Clear from Simon Says Stamps! I love this tool for adding subtle sparkle to my projects.


For the box, which holds all four cards and their matching envelopes, I used the Cricut Craft Room along with the Artiste cartridge. The box is found on page 57 and basically I enlarged it until I could see that a 2-3/4" x 4" card would fit (10.944 x 5.667). I then cut it out of a piece of B&T paper from the Lollydoodle Paper Packet. I used a border strip from that paper packet as well and wrapped that around the box. I then stamped the flowers twice on a 2" x 3-1/4" piece of Daisy White cardstock in Sorbet for the background and Cotton Candy for the outline (darker part). I then stamped four leaves in Pear. The center flower was stamped on Cotton Candy cardstock with Cotton Candy ink and then attached with 3-D Foam tape. I wrapped a piece of baker's twine around this panel three times and then tied it in a bow. I then attached that piece of cardstock to a 2-1/4" x 3-1/2" piece from the paper packet with 3-D Foam tape and attached that to the box with adhesive.

My envelopes were created with a piece of heavy-weight copy paper cut to 6" x 6". I then used an envelope punch board at 2-5/8" for the first punch. After assembling the envelopes I stamped them with the same stamps used on the cards using all three colors.


I also did a short video going over how I put this project together. You can watch it below.

Here is just one more variation of this card. On this one I mounted it on a piece of Cocoa cardstock which really frames the focal image. I am submitting this to The Card Concept challenge for this week. I made the following substitutions to their colors: Lime = Pear and Espresso = Cocoa. White is White! I consider this to follow along with their Clean and Layered style.


Thank you so much for stopping by and leaving a comment. 
Happy Paper Crafting!
~Angelina